General Settings before Using the Utility
Office 2007 Users :
-
Click Microsoft Office Button> Excel Options> Trust Center > Trust Center Settings Button> Macro Settings.
-
Under Macro Settings, choose “Enable All Macros” and Click on OK button.
Office 2003 Users :
-
Click on Tools Menu> Options> Security
-
Choose Macro Security as “LOW”.
Getting started with eParinaamTM
eParinaamTM is ready to use after download. You just have to follow the below steps after downloading the utility-
-
Extract the ZIP File using Winzip or WinRar software.
-
Open the file of any class, and start using the application.
After opening any file, you will see Home Page of utility as below-

First of all, Click on “Subjects & Maximum Marks”, which is available on top right on home page.
On the next page, you can customize your Subjects Names & Maximum Marks for each subject-
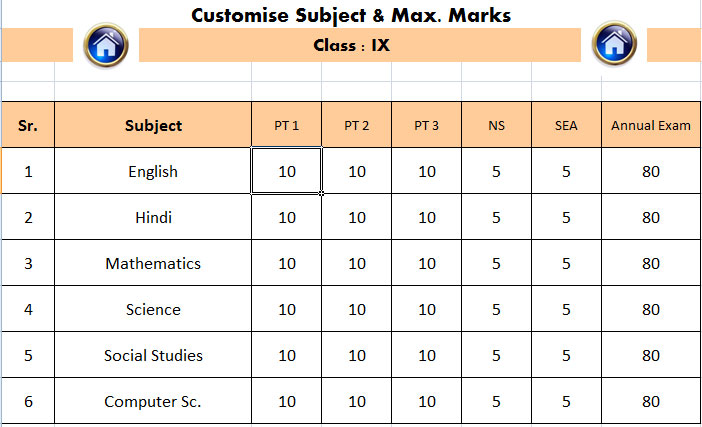
Now click on “Home” button to go to Home Page again. This button is available in all of sheets of utility, and you can use this button to go to Home Page of utility-

Data Entry Section-
Use this “Data Entry” section to Enter Students’ Particulars i.e. Name, Father’s Name etc., and Subject wise Marks. You will also enter Attendance and Grades for Co-Scholastic & Discipline from this section only-
Student Particulars-
In this section, you will enter Students’ Names, Father’s Name, Mother’s Name, Date of Birth etc-
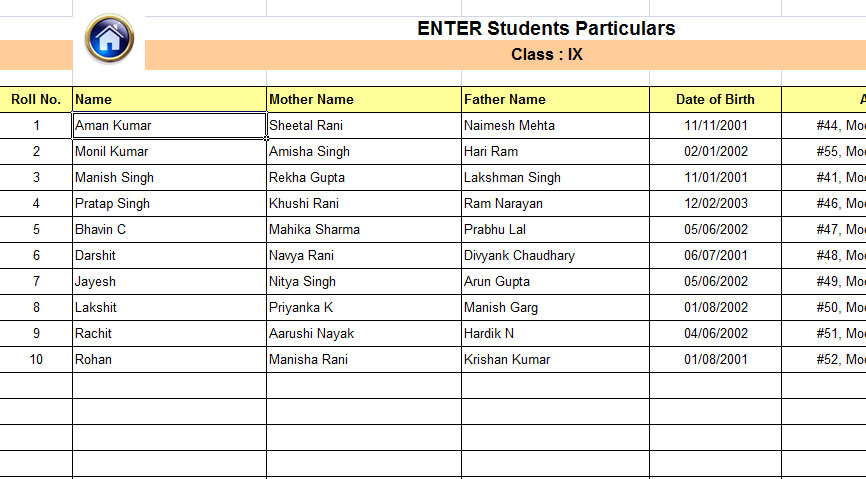
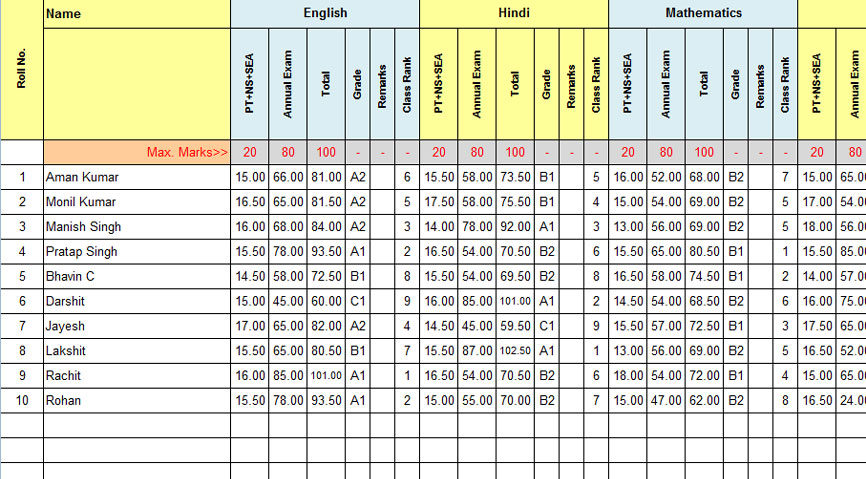
Enter Marks-
In this section you will enter Marks for each subject-
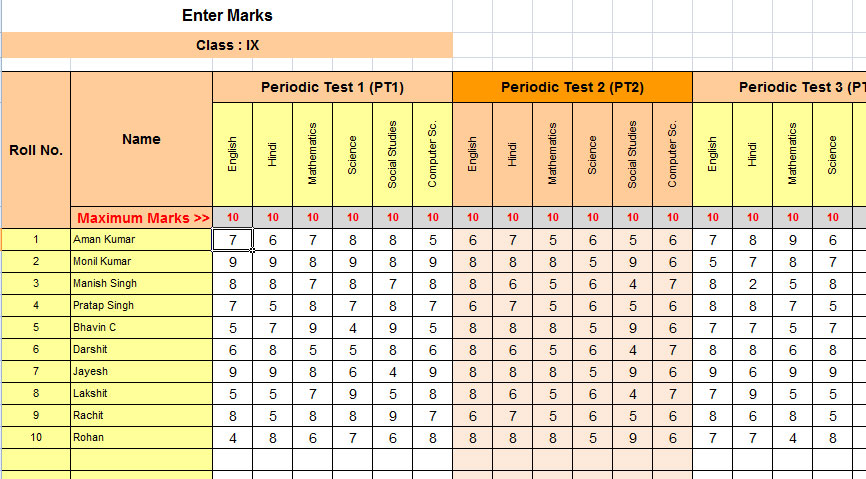
Attendance-
In this section you will enter Attendance of students-
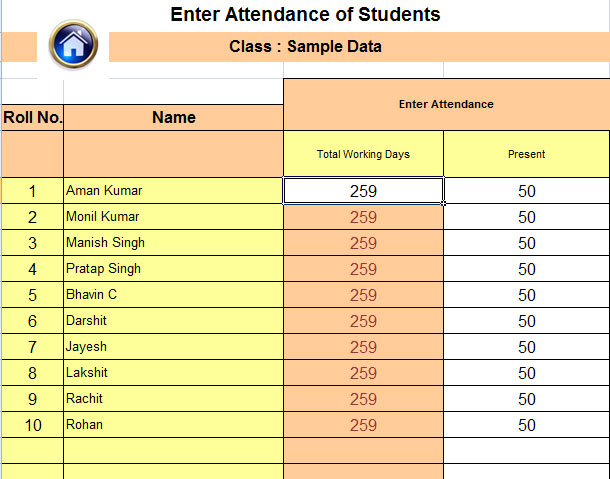
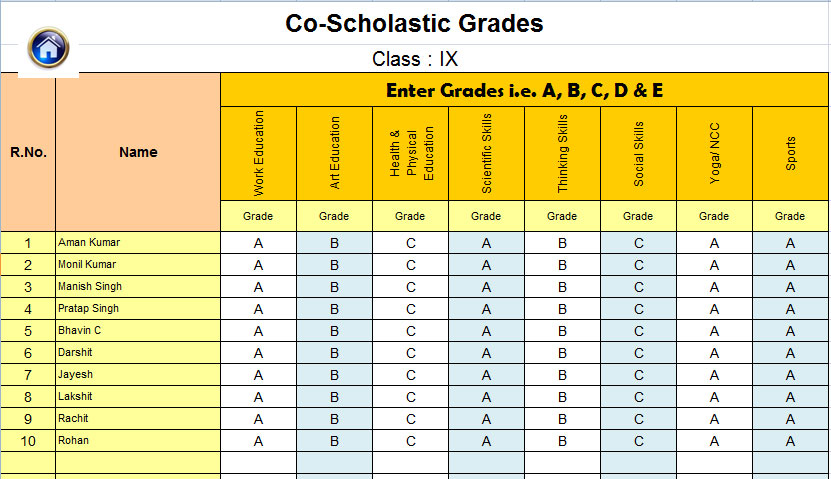
Co-Scholastic & Discipline-
In this section you will enter the Grades for Co-scholastic and Discipline areas-
Print Report Card -
Click on any link available in this section like- PT1, PT2, SEA or Final Report Card to Print Report Cards. For example if you just have entered PT1 Marks, you can Take Printout of PT1 Report Card, and so on. You have just to enter 'Roll Number' to printout a report card.
Print Class wise Reports-
You can take printouts of class wise reports like- PT1, PT2, PT2, Term1, Term2, Annual Exam and Final Mark List of whole class-
Report Card Issue Date-
Enter the current date here; it will print on your Report Card as ‘Report Card Issuing Date”. It can be changed every time when you take printout of a new report card.
Promoted to Class-
Enter the Next Class in this section, where the student is promoted to.
Update School Information-
You can update your school’s address, Email, Phone Number and Academic Session etc through this section. |